MAC 2010 Summer Collection: To the Beach (Pt. 2)

Thursday, February 25, 2010
So here's Part 2 of this new collection- some of this stuff is less appealing to me than others. 


Nail Lacquer 


  • In the Buff: Muted Taupe Avocado (Cream)
  • Scorcher: Creamy Bright Coral Red (Cream)
Skipping. I never buy MAC nail polishes.

To the Beach Bag


Cute, but it's $49.50 USD and looks like the rope handle would get dirty easily. Probably not for toting my beach gear to and from the shore. 


Cream Bronzer


  • Beach Bronze: Golden Glow with Soft Gold Finish
  • Weekend: Mid-Tone Deep Orange Brown with Soft Pink Pearl
I have a deep rooted belief that I just don't look good bronzed. In my head, I know I should skip these, but the descriptions make me wonder... maybe it's possible? After all, I've never tried cream bronzer.


Bronzing Powder


  • Golden: Muted Golden Tan-Beige with Golden Shimmer
  • Refined Golden: Finely Spun Golden with Soft Pearl Finish


Skippin'. 


Lustre Drops


  • Pink Rebel: Blue Pink with Gold Pearl
  • Sun Rush: Peachy Bronze with Gold Pearl
I really want these!- none of my liquid highlighters have gold pearl, only pink. If I had to limit my choices, I'd get Sun Rush. I can't wait to try a drop of it in my foundation and body lotion, I bet I'd get a nice glow!


Bronze Body Oil

  • Glowing Tan with multidimensional Golden Shimmer


Does this remind anyone else of a body oil that Victoria's Secret used to carry? (Not sure if they do anymore). I think I still have a bottle lying around, because I never finished it. 

Who else is anxiously counting down the days 'till this is released?

Here's Part 1, in case you missed it. 

MAC 2010 Summer Collection: To the Beach (Pt. 1)

Wednesday, February 24, 2010
Oof, I've been bringing MAC up a lot lately, haven't I? First Viva Glam lipsticks, now this. Well, I don't actually get too excited about MAC too often (in fact, in the last year I only purchased from them twice) but this upcoming summer collection has my bikini in a twist.  It's actually been driving me nuts that they keep coming out with 'new' collections every 4 minutes, it seems like. And most of these collections don't even comprise of new stuff, just repromotes in new packaging. ChicProfile has all the info, but I thought I'd sum it up for you, and give you my thoughts (click here to go to read it in entirety from ChicProfile). 
Here's What You Need to Know:
U.S. Release Date: May 27, 2010
The name is self explanatory- think warm beaches, Australian shores and coral.  


Eyeshadow


  • Sand & Sun: Light Peach (Matte)
  • Firecraker: Frosted Mid-Tone Red Orange (Veluxe Pearl)
  • Sweet & Punchy: Bright Yellow Green (Veluxe Pearl)
  • Shimmermoss: Green with Green Pearl (Veluxe Pearl)
  • Humid: Intense Green with Shimmer (Frost)
I'm mostly interested in Sweet & Punchy and Shimmermoss (which I'm told is a repromote from Fafi). I might skip the latter though, because though it's lovely, I don't think I'll wear it often. 

Eye Kohl


  • Float on By: Dark Green Turquoise
  • Rosemary & Thyme: Mid-Tone Olive Gold with Shimmer
Will probably skip, because I have similar shades, but if I didn't have an olive eyeliner, I'd definitely pick up Rosemary & Thyme. 

Lipstick


  • BeachBound: Sheer Frosted Pale Peach (Glaze)
  • Lazy Day: Light Dirty Blue Pink (Lustre)
  • Thrills: Rosy Copper with Gold Pearl (Frost)
  • FunBathing: Mid-Tone Bronzed Plum (CremeSheen)
Thrills, perhaps? It doesn't seem to really fit the mood that I'm sensing from this collection, but I can't complain.

Lip Pencil


  • Life’s a Breeze: Soft Pink
  • Temperature Rising: Loudmouth Orange
I have shades similar to Life's a Breeze, and to be honest I'm trying to envision an orange lip liner used in a classy look and failing. Probably will skip both. 


Lipglass


  • Easy Lounger: Light Baby Pink with Multi-Dimensional Pear
  • Flurry of Fun: Sheer Sparkly Peach
  • Splashing: Mid-Tone Blue Pink with Soft Gold Pearl
Easy Lounger is mine. 'Nuff said. The other two, I will probably forgo, though they look stunning (I would love to see a lovely pale lady rocking Flurry, and a med/dark beauty with Splashing upon her puckering lips). 

Powder Blush


  • Hipness: Intense Coral with Soft White Pearl (Frost)
  • Get-Away Bronze: Mid-Tone SunTan (Frost)
You know I want both, but I highly doubt my budget will allow for that! I really have to see these swatched in person before I decide. 

High Light Powder


  • Marine Life: Multicolour Pressed Powder

Uhm, do I really have to say anything? I need this. I really do. Ok, so the gold scraffito is overspray, but it looks really promising. Last time, I said I could live without Ripe Peach from the Spring Forecast collection because it was two toned too and it ended up being stunning. Will not make the mistake this time! How much you want to bet that this will be sold out fast?

Here's Part 2: Read on!


Is There Anybody as Excited as I am For These?

Monday, February 22, 2010
I'm really loving Target right now, honest. I recently picked up one of those famed amazing Studio Tools duo fiber brushes (more commonly known in the makeup world as a 'skunk') on clearance for $3.88. Although, I think it was red-tagged out because they're being discontinued, which does sadden me. But onto the more exciting news!
Sonia Kashuk 2010 Spring line!  Are those brushes not gorgeous? I can't wait to get my hands on some, but my local Targets are always slow on stocking new items. I saw a picture posted by a fellow MUAer, and it made me a little sad to see brushes that were touted as 'natural' being wrapped in hard plastic packaging. But then I took a closer look, notice how the ad says 'eco chic' not eco friendly? Sneaky. None the less, the brushes look like they are beautifully crafted- just look at that round cut on the blush brush- and a tapering point too!
More great news about thrifty brush finds- do you remember during the last holiday season, there were some select e.l.f. Cosmetics items available at Target? It was mostly all from the $1 line, but also some value sets too. Well, e.l.f. Cosmetic's facebook confirmed that they would be releasing more items, and hinted that some Studio Line items would be available!

Reviving Gel Liner- What not to do!

Sunday, February 21, 2010
What does Bobbi Brown, Napoleon Perdis and MAC all have in common? They all have a gel liner that seems to dry out in the pot. After a few months of use, I always find that my gel liners harden a little in the pot. Actually, have you ever seen a gel liner tester at a store that wasn't rock hard and shriveled? Now, I hate waste and would really like to be able to use every drop of a product (I paid for it and I want it!), so I set about looking around the internet for a way to revive my liners. Some people said that they used oils, glycerin and Visine, among other things. Oils didn't work for me- neither did glycerin even though I all I added was one small drop and mixed thoroughly with a toothpick. Once I added oil to the gel liner, it didn't dry at all- and completely ruined the finish. Glycerin is a little better, the new mixture felt smooth but because glycerin is so potent, one drop really effected the formula. It just didn't dry well and lost it's staying power. 
Eye drops are ideal! Think about it- because it's formulated for the eyes, it stands that it won't cause irritation, right? Least that was my line of thinking. I used my Visine for contact wearers, and just added one large drop but didn't stir. Instead, I waited ten minutes or so and just let that drop soak into the surface of the hardened gel. It revived it completely to the consistency I wanted, so I added a couple more drops to the surface. Hooray for salvaging makeup!

New MAC Viva Glam lipsticks!

Tuesday, February 16, 2010

Chances are, if you're obsessed with makeup, not only have you already heard of the new Viva Glam lipsticks, but you're tired of it being mentioned.
But for everyone else, let me introduce to you the two newest additions to MAC's Viva Glam collection, VG Gaga and VG Cyndi.

That's right- two of the most interesting woman on our planet now have luscious colors housed in black bullet lipstick cases worthy of them. I'm a huge fan of both, and even if I wasn't, these colors are still simply divine. 
VG Gaga is a bright bubblegum pink- though sheer and buildable, (both lipsticks are Lustres) it is a bit on the cooler side. Don't let that deter you though! I'm quite neutral and I can still pull it off. It's my belief that Viva Glams are formulated so that they are appealing to the most number of women possible. VG Gaga is similar to MAC's Saint Germain (Saint Germain is bluer) and in an interview with Marie Claire, the pop icon herself mentions that it's inspired by the lipstick she used to wear (but modified to suit her tastes), Pink Nouveau. 
VG Cyndi is my favorite- it's a beautiful strawberry that's incredibly versatile. I'm becoming more and more infatuated with each use- and I have to admit that this is my first sheer coral red lipstick. I'm kind of a bold red lip hoor, for me it's opaque or nothing. However, this color is so glamorous in so many ways, I've worn it with 4 different styles of application so far and loved them all.
These lipsticks are definitely something you'll want to pick up- they're so immensely popular that VG Gaga is temporarily sold out on the site. Have no fear! Though limited to a year, they will be restocked soon at your nearest MAC counters. 


A very (un)successful Valentine's Day weekend.

Sunday, February 14, 2010
I blew it.
My February no-buy, that is. It started on the 10th, I was trapped inside my home from the three feet of snow lying on the drive way and resorted to browsing the internet to keep myself sane. Unfortunately, I picked up an order from AllCosmeticsWholesale and paid for my purchase before I could talk myself out of emptying out my cart. I ended up getting a 28 slot magnetic Stars Makeup Haven palette, a discontinued Smashbox tinted lip treatment in Solar and a Kiehl's #1 lip balm in cranberry. Argh.
I also experienced a moment of weakness on the 12th, when I glanced at the MAC counter at Macy's and found myself buying Viva Glam Gaga and Viva Glam Cyndi lipsticks. To be perfectly fair, I already knew that I would purchase them eventually, so I guess hastened the inevitable. I then rationalized a purchase from Sephora- Urban Decay Lip Primer Potion. After all, fabulous new lipsticks deserve a good base, right? I'm kind of shocked to admit that I didn't already own any lip primer. Thinking back and assessing my makeup collection, up until a few months ago, I could count the number of lipsticks I owned on one hand. I've really been investing in a new array of colors, I guess.
Well, the next few days I'll go into detail about my purchases!
On a personal note, I hope everyone's Valentine's Day and Chinese New Year weekend was as happy as mine- I celebrated them both on Saturday and had a lovely sushi dinner with my fiance. I then convinced him to go see a children's movie (I couldn't help myself) and on Sunday, we had dim sum. 

EOTD-Burgundy crease

Wednesday, February 10, 2010
This is one of my favorite burgundy colors, I really love using it.
Eyes: MAC eyeshadow in Vanilla, Jane eyeshadow in Dazzle, NYX Chrome eye shadow in Mink, and from my own personal palette- Dionysus. Prestige Total Intensity liner in Deepest Black, L'oreal Double Extend waterproof, UDPP, pixi Eye Bright kit.
Brows: NYX brow powder in taupe/ash


Packages

I keep receiving stuff in the mail that I ordered a few weeks ago. They really do seem to make my day, like mini presents I sent in advance to myself. It started snowing again last night, so I fear I will be trapped indoors for another two days. This will help tide me over.
My three arrivals were Missha Perfect Cover BB Cream, pixi Eye Bright Kit, and three Prestige Total Intensity liners.
Let's start with the first item, the BB Cream. This was a brand new product that I had never tried the likes of. This is what it's supposed to be primer, foundation, concealer, acne medication, wrinkle reducer, SPF moisturizer and whitener all rolled into one. Mind blowing, isn't it? When I first read about bb creams (blemish balm creams) my jaw literally dropped. I wondered why we didn't have a United States counterpart. But then I realized, a by product of capitalism is that maximizing products was a must- the cosmetic corporations probably would make considerably less if all they had was one miracle product. However, I did manage to get a pretty good deal on this cream. If you buy it directly from the Missha site, it'll run you $25 plus s/h. I bought it from a seller on eBay (based also out of Korea, I believe) and paid about $11 total, free shipping. I've been told that it's quite cheap overseas, and the company that makes it jacks up the price for U.S. customers.  Based on the reviews, I picked the shade No. 21 which though matched my wrist perfectly, is a little light on my face. The consistency is like that of tinted moisturizer, but it's much more opaque and offers more coverage. I had hoped that I wouldn't have to wear a primer with it (the ingredients include quite a bit of silicones) but it definitely looks better with a layer of primer. I would definitely also wear lots of moisturizer underneath if I had dry skin. I wouldn't say that it takes the place of all the products that it claims to, more like it's a super foundation with added bonuses. Now, I have only used it a few days, so I'm not yet sure what the effects are like, but I'll be sure to update about it.


On to product number two! Step right up, pixi, let's see what you have to offer. I saw this Eye Bright kit (No. 2) on eBay with free shipping and bid on it. I ended up wining and got it for less than $6. That's certainly a steal, because it's $24 at Target. No. 2 is supposed to be for Medium/Tanned shades, I believe but matches my NW/NC20 skin very well.  
It contains 2 concealer shades, one salmon pink correcting shade and a highlighter. The concealer colors are very sheer, but I'll be honest- you have to moisturize like a madman or else the concealer will cake up and emphasize fine lines, wrinkles and dry skin. Also, you want to use a synthetic concealer brush (like this one) and use light brush strokes. 80% of the time, I find that people don't use concealer correctly and blame it on the product instead of their technique. My favorite part of this wheel is the highlighting color. Some highlighters have a lot of pearly sheen (Boots No7 High Lights and BeneFit High Beam, for example). But this highlighter is just softly luminous with very understated shimmer. I wish I could buy the highlighter alone! I don't think I would shell out $24 for this, but under $10? I'd grab more in a heartbeat. 


Last, but not least (in fact, my favorite!) are the three lovely Prestige Total Intensity Eyeliners that I bought. I had been craving MAC's Feline Kohl Power, but alas it was limited edition and I couldn't get my hands on some. Someone told me that Prestige TIs were comparable- and the best part? Super cheap! Still, I searched high and low for these babies (5 drugstores, 3 grocery stores) and eventually, managed to get them off of a fellow MUAer. I managed to get Intense Olive, Deepest Black and Bold Brown.


Let me just say, that I'm going to have to invest in a good thesaurus to find the words to describe how much I love this eyeliner. The first thing you notice is the amazing consistency, it's smoother than a con artist's lies. I have never, ever used an eyeliner that is so intensely black as the Deepest Black. The closest I've gotten is Estee Lauder's Artist Eye Pencil in SoftSmudge Black, and let me tell you- in comparison, it's a dull charcoal. I'm almost afraid to wear this black everyday- it's such a smoldering black, I'm not sure I can handle it. The brown color is actually very dark, upon my eyelids it looks black (or at least, the kind of black you would get with other brands of liners) but the contrast is much less startling. Olive, is a tricky little fiend. When swatched on my wrist, it looks and photographs as a dirty gold- a sandy brown with shimmer. However, paired with a salmon shimmer shadow on my eyelid, it definitely has hints of dark green.
Before I go any further, I have a confession to make. I wore eyeliner to bed last night. But before you gasp in horror- let me explain! I wanted to put the liners through the ultimate long lasting test. I wore olive on one eye and deepest black on the other. Olive pretty much stayed put, only the corner of my eye lost a bit of liner. There was some smudging with the black- although it was such a sexy, dirty, I-partied-too-hard-last-night and still looking stunning, I can't even fault it for that. 
Pros: Insanely rich, deep color- very opaque and pigmented. Long lasting, ridiculously smooth. Cheap! I am definitely going to get my hands on the other colors.
Cons: Not entirely smudge proof. My eyes are a little hooded and oily, so I did get a few rainbows after a couple of hours- but they were faint. The Deepest Black color also made my lids tingle a bit- some wearers might be allergic. Not for tight lining- if you wear it on the waterline and have contacts- it will stain them! Hard to find.
Also, it's a very thick pencil- kinda hard to get a thin line, but wonderful for sultry, imperfect smoky eyes. 
Definitely worth checking out. 


Whew, what a long post! Thanks for staying for the whole ride- let me know what you think!

How much longer? (LORAC swatches)

Sunday, February 7, 2010
I know, I know- I haven't even been on a no-buy for two weeks, but it's becoming increasingly difficult. Luckily for me, packages that I paid for at the end of January are finally arriving, so it's like getting mini presents every few days.
What first to talk about?
Oh! That LORAC set I ordered a couple of weeks ago. It's spectacular, and the best $20 I ever spent on 7 items. I'm really trying to move away from buying lots of low end drugstore items and only being satisfied with 1/2, and instead selectively buying more middle end to high end stuff. Now, LORAC makes a lot of really great cosmetics, and this New Year's Neutrals set is no exception. I got 7 products- 1 lipstick, 1 lipgloss, 1 cheek stamp (blush) and 4 eye shadows. Including shipping- that ends up being under $4 per item (if that's not great value, than what is?). Here's the swatches:

I love Cocoa, it's a very great all over the lid shade. Beige is matte and really blends into my skin so it barely shows up, but because it's so good quality- it makes a great base (unlike Revlon Matte Peach Sorbet, same color, terrible quality). Cappuccino is a very nice milk chocolate color, mostly matte with the tiniest hint of shimmer (not noticeable). Mesmerize looks great swatched, but I find it looks a little orange on my face, might have to give it to someone who looks good in warm shades. 
The lipstick is amazing, a great creamy consistency and pretty long lasting. At first, I thought the color was a bit too 'old' for me, but with the Peach Passion lipstick on top, it's not that odd of a look. The lipgloss, oh my! It's SINFULLY delicious smelling. If I close my eyes, I could swear that I was sniffing an artfully mixed cocktail with pineapple and hints of peach and mango. Too bad it isn't flavored (or perhaps it's a good thing, because I'd eat it). I will say that my pictures makes it look a bit glittery, when in fact it is very sweet looking peach shimmer. The cheek stamp, now that needs further explanation. It's the same kind of packaging as The Body
Shop's Kiss of Color blushes. The sponge applicator rests on the blush when it's closed. That's a big no-no for me. Why would you ever want something that comes into contact with your cheeks (oil, skin cells and grime there!) resting on your blush cake? That's how that layer of hard oily residue ends up on cakes, from the oils on your skin! I also think that it wastes a lot of blush- because if you use the applicator alone, you end up with clown cheeks. Using a separate blush brush is ideal, but if you have to use another brush, what's the point of the applicator?  However, the color of the blush itself is quite nice, just as the name implies, a nice golden peachy color without any shimmer or glitter. 
Overall, it's such a lovely set of products. I really am starting to want more and more LORAC make up, but it'll have to wait till next month. 

NYX $1 Haul- Swatches

Saturday, February 6, 2010

Today is a snow day, and with 26 inches of the fluffy stuff piled on the drive way, there's absolutely no way that I'm going to be able to go anywhere. I guess I'll finally catch up with my swatching! I don't know why I've been putting it off, I had a fun new camera to play with (not really new- my fiance lost the expensive memory chip to his expensive camera and I finally found it again) the I ordered a ton of stuff off of the NYX website when they had a $1 sale going on about 3 weeks ago and I happily received my package sometime last week. I made a quick haul video on YouTube to quickly run over what I got (you can watch this here). Here's some of the items I got: 


In addition to these- I also bought 5 boxes of false lashes and a few eye liners, but unfortunately it got too dark outside to take any more pictures.
Notice how all the shadows I bought were nice neutrals and I got very few wild looking colors overall? I made myself go easy and only buy items I thought I would actually use. *pats self on back* Now, Oro Brush on Lipgloss and Honey Jumbo Lip Pencil are a whole 'nother story. The swatches online were totally inaccurate and I ended up getting a tacky orange/bronze opaque lipgloss and a poop brown jumbo lip pencil. But hey, I think I made out ok- after all everything was $1 and I liked 28/30 items. Pretty good odds. 

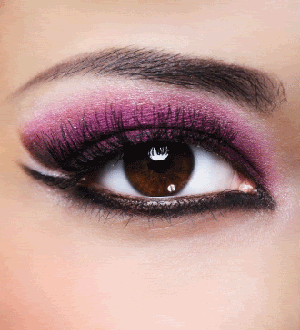
Tutorial: Magenta Winged Look

Thursday, February 4, 2010


A fellow member of MUA asked me to break down this look- so I gave it my best shot. It's actually pretty simple, the most difficult part of this is creating that cut look on the side, and the blending to create that beautiful gradient. 
List of items used: 1 large fluffy eyeshadow brush. 1 small eyeshadow brush, 1 smudger brush, 1 blending brush, 1 eyeliner brush, a pair of scissors, a Post-it note, Wet'n'Wild Arch Envy, e.l.f. cream liner in black, eyelash curler, black eyeliner and 4 colors of eyeshadow- a pearly white, a bright hot pink (can be with or without shimmer), a shimmery violet (super pigmented) and a charcoal black (with or without shimmer). 


The first thing I did was to cut out a crescent piece out from the sticky part of the Post-it note- that's going to be the stencil for my look and placed it on the edge of my eyebrow with the other end close to the edge of my eye. It's the key to getting that really clear cut edge on the outer lid (See picture for detail). I applied the tiniest bit of Urban Decay Primer Potion all over my lids (and a little under them too). Next- I swiped that frosty pearl white with the largest brush all way from my eyebrows down to the lashes, even under my eye and in the inner corner as well. The next step is to apply the pink. It's important to use very pigmented colors- or else I find that you lose the essence of the color when you blend the shadows together. Here I'm applying the pink to most of my eye (small eyeshadow brush), and from the lashes to the middle of the lid, just above the crease and out as far as the end of my eyebrow. Gently blend the pink into the white at the brow bone area.


Now, I'm going to add the next color- that purple. I choose a violet that was on the pinker side of the spectrum. If you were to use a burgundy (that's more red) or an indigo (more blue) then it wouldn't melt into the pink color as effortlessly. So, clean off your small eyeshadow brush and apply that violet to the bottom third of the eye (from the lashes right up to the crease). With your blending brush, use small strokes to blend it into the pink. Then, I edged my upper and lower lash lines with that dark charcoal black with the smudger brush. Depending on how pigmented your purple is- you might have to add another layer of violet on top of the black to really make that color pop out. Between each color application though- blend, blend, blend. 
Now, peel off the Post-it. You should have a flawless edge therel (if not, no problem- clean it up with a Q-tip and make up remover)
Here's my favorite step: adding that cream eyeliner. The smaller the brush, the more precise you can get it. Starting at your inner tear duct, draw a 'V' like so: 


Line the rest of the upper eye lid, stopping at the edge of the eye. On the lower lid, line the waterline all the way pass the edge, but bring it past the edge of the eye- extend the line half an inch past. There should be a space between that extended line and the upper lid, like so- 


All that's left after this is to go over the cream liner with black pencil (this will soften the line a bit so it isn't quite so harsh and make the look really last) or you can even stop at this step. Curl your lashes and apply a lengthening mascara and it's all done!


Tips: Make sure you start out with clean brushes. Dirty brushes will contaminate your beautiful colors. Also keep Q-tips handy for clean up and don't be afraid to keep practicing this look- if your hands are steady it might take a few attempts to get it right.